Back to the dinners!
Yes, we have been eating dinner around here. Yes, I have been taking pictures of [most] everything. I just haven't gotten around to posting everything--I needed to take some time off for finals.
But now, finals are DONE! Break it here. Let the good times rolll.
I am sad, and slightly embarrassed to say that Pigs in a Blanket are quite the staple around the Yerrick household. They are pretty much our go-to dinner when I don't feel like cooking, but we don't feel like going out either, or if we're in need of a speedy dinner. The whole dealio, from start to finish, takes about 20 whole minutes.
You may be wondering, "Does she realllly need to share a recipe for Pigs in a Blanket? Doesn't everyone know how to make them?" My answer, my friends, is this: Yes. I need to share because, No, not everyone knows. Actually, most everyone makes them differently.
Now, for those few of you that are completely lost, wondering, WHAT THE HAY is a Pig in a Blanket? I mourn for you. I mourn for your childhood, lackless of little delicious piggies wrapped in crunchy, flaky blankets.
I present:
Pigs in a Blanket
What you'll need:
1 package of Lil'Smokies Cocktail Weenies (I got the cheese filled ones for extra deliciousness.)
1 package of crescent roll dough
salt & pepper
chili powder
garlic powder
Yep. That's really all you need. No, I'm not kidding.
Here's what you do, although you can probably figure it out from the picture...
Get your supplies ready.
Pop the can (I can never get the dang thing to pop...Just once I'd like it to pop normal without me having to bang it on the counter several times to dent it, UGH!) and roll out the dough on a sheet tray lined with foil.
Separate all the pre-cut triangles.
Now, those are too big for my Lil'Smokies, aren't they? Plus, there are about a million Lil'Smokies in a package and only 8 dough triangles. What to do, what to do?
I'll tell you:
Cut the dough triangles into 3 or 4 long-mini triangles with a pizza cutter. Tada! Now you have 8 times 3 or 4 (that's 24 or 32) pieces of dough for your million Lil'Smokies.
Let the rolling begin!
Put the Smokie on the fat side of the triangle and roll it towards the smaller end. It makes for a nicer presentation, and we all know, it's all about presentation on these suckers.
See? Gorgeous.
Keep on rollin' til you have a little weenie farm.
I just said weenie farm. Ha. I said it again.
Weenie farm, weenie farm, weenie farm. I need some coffee.
Well, now that that's done...This, folks, is where things are about to get craaazy.
Sprinkle them all with salt, pepper, garlic powder, and chili powder. Just for a little extra bit of flavor.
Bake in a preheated oven at 375˚ for 10-12 minutes, or until done.
This is what you get. Yum. Simple. Yummmm.
I'm guessing that most normal people don't eat these for dinner. We do. Don't judge. They are great for an appetizer or an after-school snack as well. For dinner, I usually pair them with Mac and Cheese and a vegetable of sorts, for a well rounded meal.
I've also heard that Paula Dean has her own version of these. I'll have to look into that....
December 18, 2010
December 04, 2010
Baked Ziti
No, no. I haven't forgotten about you guys--promise! It's just been a really busy week. I haven't forgotten to take pictures of my cooking, though. I just haven't had time to post what we've had for dinner the rest of the week.
I left off with Monday when we had delicious Scallops & Pasta. On Tuesday night we ended up going to our friend's house for dinner. Then, Wednesday, I broke we broke our no going out to dinner deal and went out to dinner. Boo, us. But, in my defense, when you've had a long week by Wednesday, you deserve some good comforting Mexican food. Right?
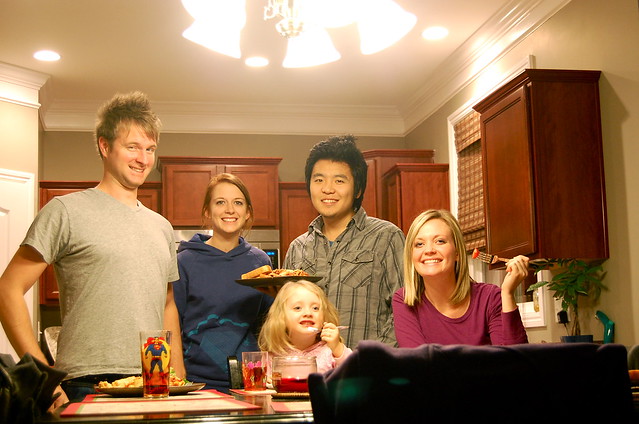
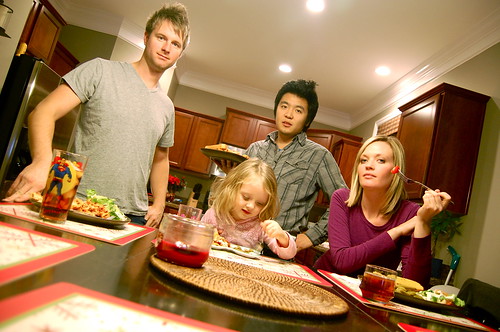
So, back to Tuesday. We went to our good friend's house and scarfed down an Italian Feast! Phil made us all a delicious baked ziti--and he shared his top secret recipe with me! So, while I don't have step by step instructions for you, I do have a scrum-diddly-umptious recipe for a rather simple and satisfying dinner!
Baked Ziti Made by Phil Brock. Recipe from Allrecipes.com
Ingredients
- 1 pound dry ziti pasta
- 1 onion, chopped
- 1 pound lean ground beef
- 2 (26 ounce) jars spaghetti sauce
- 6 ounces provolone cheese, sliced
- 1 1/2 cups sour cream
- 6 ounces mozzarella cheese, shredded
- 2 tablespoons grated Parmesan cheese
Directions
- Bring a large pot of lightly salted water to a boil. Add ziti pasta, and cook until al dente, about 8 minutes; drain.
- In a large skillet, brown onion and ground beef over medium heat. Add spaghetti sauce, and simmer 15 minutes.
- Preheat the oven to 350 degrees F (175 degrees C). Butter a 9x13 inch baking dish. Layer as follows: 1/2 of the ziti, Provolone cheese, sour cream, 1/2 sauce mixture, remaining ziti, mozzarella cheese and remaining sauce mixture. Top with grated Parmesan cheese.
- Bake for 30 minutes in the preheated oven, or until cheeses are melted.
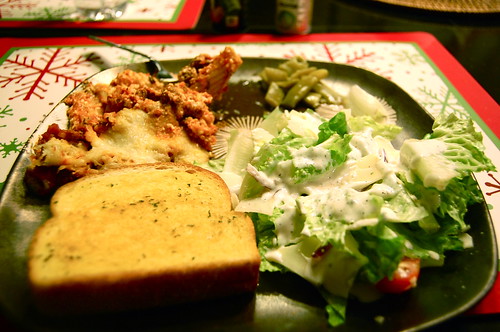
Yumyumyum. Delicious and simple. Serve with garlic toast and a caesar salad. Perfect weeknight dinner!
Outtake: While I was setting the timer...
I should have Pork Tenderloin with apples & leeks and cauliflower gratin for you tomorrow (or Monday)...Until then, I leave you with a brain-teaser :
At 7 a.m. a high-speed electric train moving 90 mph leaves New York heading for Chicago. At 8 a.m. a train running 110 mph leaves Chicago heading for New York. The distance between the two cities is 700 miles. The weather and the wind speed is exactly the same for both trains. Since neither train experiences any delays, when the two trains meet which one will be closer to New York?
November 29, 2010
Scallops & Pasta
I've never made scallops before. Apparently it's just not something they teach you in school...So I Googled it. You find anything on Google. I learned how to crochet from Google. I learned how to use Oxyclean from Google. I learned how to get my dog to stop barking from Google. I learned how to cook scallops from Google.
Now, via Google, you will learn too.
Tonight for dinner we had Scallops and Pasta.
Paul LOVES scallops. He's not able to eat them very often, but I'm sure if asked, he'd say they are one of his favorite foods. Me, eh, I'm not the biggest fan--but anything for my boo. I do like pasta, though. Yummm pasta...So this dinner worked well for the both of us--and it was really quite simple.
The first thing you need to do is put a pot on to boil the pasta. Don't forget to salt the water. I cannot stress this enough, folks! You need to salt you pasta water! And I'm not just talking a pinch, I'm saying add a good tablespoon. A good fistful. A good amount of salt!
Adding salt raises the boiling temperature of the water. It doesn't make the water boil faster, like most people believe, but it does make the pasta cook faster because it allows the water to get hotter than 212˚ (boiling point). I learned this from Google as well. The reason I stress salting the water though is not to make the pasta cook faster, it's to season your pasta. This is the only way to actually season pasta because the salt won't really stick once the pasta is cooked...so why not just cook it in salt? Salt, yummmmm.
So. First: boil your water.
While your water is boiling, chop up 1 tomato, a couple sprigs of parsley, 2 garlic cloves, and slice a lemon in half.
Also, measure out 1 cup of white wine (or chicken stock, or beer) and 1 tablespoon of butter.
Set all that stuff aside--once your pasta is done cooking, drain it and set it aside as well.
Now, for the scallops:
The most important thing about pan-searing scallops is to make sure they're dry. So when you get them out of their package, put then on a plate with paper towel. Then flip them over, to dry the other side. Then, move them to a brand new dry paper towel. Then pat the top again. As they sit, their juices come to the surface, so make sure you pat them right before you put them in the pan. Oh, and sprinkle them with salt and pepper.
After a minute and a half, remove the scallops from the pan and transfer to a new paper towel.
(Note, these cooking times are for large sea scallops, cooking times are different for smaller sea scallops.)
Next, reduce the heat in the pan to low and add a tablespoon of butter (unless you have a lot of oil remaining in the pan from the scallops.) Add the chopped garlic. 10 seconds later, add the diced tomato. After about a minute, turn the heat back to high and add the wine (or chicken stock, or beer).
When you add the wine, the pan should steam a whole lot and all the brown bits from the bottom of the pan will be released. Use your spoon to scrape up these brown bits as you stir around the wine. Add the chopped parsley.
About a minute later, add the cooked pasta to the pot and mix it well. Sprinkle with fresh squeeze lemon juice (half a lemon).
Serve in a bowl with the scallops. Garnish with parsley sprigs.
Yumyumyum. My first scallops experience was a success and it only took about 20 minutes. Paul LOVED it too, an added bonus!
The easy to follow recipe:
Scallops & Pasta from Steamykitchen
Gotta go! I'm chatting with my Boo on Facebook chat....Well, umm...We're on the same couch too...
Enjoy :)
Now, via Google, you will learn too.
Tonight for dinner we had Scallops and Pasta.
Paul LOVES scallops. He's not able to eat them very often, but I'm sure if asked, he'd say they are one of his favorite foods. Me, eh, I'm not the biggest fan--but anything for my boo. I do like pasta, though. Yummm pasta...So this dinner worked well for the both of us--and it was really quite simple.
The first thing you need to do is put a pot on to boil the pasta. Don't forget to salt the water. I cannot stress this enough, folks! You need to salt you pasta water! And I'm not just talking a pinch, I'm saying add a good tablespoon. A good fistful. A good amount of salt!
Adding salt raises the boiling temperature of the water. It doesn't make the water boil faster, like most people believe, but it does make the pasta cook faster because it allows the water to get hotter than 212˚ (boiling point). I learned this from Google as well. The reason I stress salting the water though is not to make the pasta cook faster, it's to season your pasta. This is the only way to actually season pasta because the salt won't really stick once the pasta is cooked...so why not just cook it in salt? Salt, yummmmm.
So. First: boil your water.
While your water is boiling, chop up 1 tomato, a couple sprigs of parsley, 2 garlic cloves, and slice a lemon in half.
Also, measure out 1 cup of white wine (or chicken stock, or beer) and 1 tablespoon of butter.
Set all that stuff aside--once your pasta is done cooking, drain it and set it aside as well.
Now, for the scallops:
The most important thing about pan-searing scallops is to make sure they're dry. So when you get them out of their package, put then on a plate with paper towel. Then flip them over, to dry the other side. Then, move them to a brand new dry paper towel. Then pat the top again. As they sit, their juices come to the surface, so make sure you pat them right before you put them in the pan. Oh, and sprinkle them with salt and pepper.
Please excuse my nails. I had to remove my nail polish in a rush this morning before school. Grossss.
For the most perfect, golden brown, crunchy sear that you really want on these bad boys--make sure your pan is piping hot. Hot hot. Not burning hot, but hot. To test if its hot enough, get your finger wet and splash just a drop of water on it. If it sizzles, it's hot enough.
Drizzle a dab of oil in a hot hot large skillet, about a half dollar size. I used olive oil because it was handy, but you can use vegetable oil if you desire. I don't recommend butter because it burns faster than oil. You don't want to burn these suckers. Swirl the oil in the pan so it coats it.
Lay the dry scallops in the pan with plenty of space in between them. You want them to have enough room to get a good sear. Here's a secret when you put them in: DON'T MOVE THEM!
Leave them be. Let the scallops rest. Let them get nice and toasty brown. Let them get a delicious crust. Let them sit in peace for 2 whole minutes.
After 2 minutes, flip them over. Let them cook again for another minute and a half--again, DON'T move them! Drizzle a little more oil in the pan and swirl it around after you flip them.
After a minute and a half, remove the scallops from the pan and transfer to a new paper towel.
(Note, these cooking times are for large sea scallops, cooking times are different for smaller sea scallops.)
Next, reduce the heat in the pan to low and add a tablespoon of butter (unless you have a lot of oil remaining in the pan from the scallops.) Add the chopped garlic. 10 seconds later, add the diced tomato. After about a minute, turn the heat back to high and add the wine (or chicken stock, or beer).
When you add the wine, the pan should steam a whole lot and all the brown bits from the bottom of the pan will be released. Use your spoon to scrape up these brown bits as you stir around the wine. Add the chopped parsley.
About a minute later, add the cooked pasta to the pot and mix it well. Sprinkle with fresh squeeze lemon juice (half a lemon).
Serve in a bowl with the scallops. Garnish with parsley sprigs.
Yumyumyum. My first scallops experience was a success and it only took about 20 minutes. Paul LOVED it too, an added bonus!
The easy to follow recipe:
Scallops & Pasta from Steamykitchen
- 4 ounces, weight Dried Pasta Of Your Choice
- 10 Sea Scallops (or Jumbo Shrimp)
- 1 Tablespoon Olive Oil
- 1 Tablespoon Butter
- 2 clovea Garlic, Finely Diced
- 1 whole Tomato, Chopped
- 1 cup White Wine, Beer, Or Vegetable Stock
- 3 sprig Parsley, Finely Minced
- Just A Bit Of Freshly Squeezed Lemon Juice
- Salt And Pepper
1. Cook the pasta in salted water per the instructions on the box. Drain and set aside.
2. In the meantime, prep all the ingredients and have them at the ready nearby. For the scallops (or shrimp), use a couple of layers of paper towels and pat very dry. Move the scallops to a clean sheet of paper towel and pat dry once more. Season with salt and pepper on both sides.
3. Heat a large frying pan or saute pan over high heat. When hot, swirl in the olive oil. Add the scallops to the pan, not touching. Give each scallop ample room so that they can sear properly. Cook for 2 minutes without touching (1 1/2 minutes if using smaller pieces of scallops or shrimp) then flip and cook for another 1-2 minutes until cooked through. Remove to a plate.
4. Turn the heat to low. Add the butter and the garlic. Saute for just 10 seconds and then add the tomatoes.
5. Turn the heat to high and add in the white wine (or beer or vegetable stock). Let it bubble a bit for 30 seconds and use your spatula to scrape up the bits in the pan. Season with salt and pepper, throw in the parsley and then add in your cooked pasta. Stir well to let the sauce coat the pasta. Serve with the scallops.
Gotta go! I'm chatting with my Boo on Facebook chat....Well, umm...We're on the same couch too...
Enjoy :)
November 28, 2010
Polenta with Sausage Ragout
Well, I've done my shopping (thanks to coupons and bargains, I managed to get all this food for about $60) and now I will share with you what we're having for dinner this week (or 2 weeks, if I can stretch it) in the Yerrick household.
In the month of August we spent nearly $450 on eating out. FOUR HUNDRED & FIFTY DOLLARS! There are only TWO of us. That's a LOT of money.
I know what you're thinking...Aren't you in culinary school? Aren't you supposed to cook?
I do! I do cook! I cook all day at school...then I cook all night at work. The last thing I want to do when I get home is cook some more. But I'm going to do it. I will, and Paul has agreed to help me. The Yerrick's are eating in. No more dining out...Okay, not no more, but less. Far less. About $400 dollars less.
I love polenta. Have you had it? Have you heard of it? It's delicious. What is it? It's basically just boiled cornmeal. Gross, right? Nope. It really is scrumptious. It's scrumptious when you add loads of parmesan cheese and butter, and salt (3 of my favorite foods!). It has a wonderful smooth and creamy texture, and it's super rich and satisfying. It's kind of like mashed potatoes, but, dare I say...better. And a lot simpler.
Well, I've been craving it lately...and I had all the ingredients, so I made it last night. And then I ate it. Sooo, I decided to make it again tonight, and tonight I made it with sausage ragout (rag-goo). Don't be afraid, ragout sounds fancy but it's basically just a hearty stew (or sauce, in this case) with vegetables and seasonings. Kind of like Ragu spaghetti sauce....Hmm, I wonder where they came up with their name.
Anyways, I ate polenta again. But this time, I took some pictures to share with you. Without further adieu, I present:
Polenta Cakes with Sausage Ragout
For the polenta you will need:
3/4 cup yellow cornmeal (not the quick kind)
4 cups water
1 teapoon salt
1/4 teaspoon pepper
1 tablespoon unsalted butter
3/4 grated parmesan cheese
(you're going to have it grate it yourself, the stuff in a jar just wont work.)
Firstly, bring the water, along with the salt and pepper, to a boil in a medium saucepan.
Once the water is boiling, slowly add the cornmeal, whisking constantly. Don't add more cornmeal until the stuff already in the pan is mixed in, this will prevent lumps. You don't want lumps. It's not like lumpy potatoes that are good. In polenta, lumps = gross.
When all the cornmeal is added, reduce the heat to low and let it simmer until thickened. Make sure you keep an eye on it and stir it about every minute or so. It should look about like this:
Once it looks like that, stir in the parmesan cheese and butter until both are melted.
Now, you could eat it just like this. Straight from the pot to the table. It's scrumptious this way, this is the way I ate it last night. But tonight, I did something a little bit different.
Pour the polenta into a 9x9 pan, and put it in the refrigerator. Ideally, you should let it cool a bit before refrigerating, but if you're hungry like I was, you're going to put it in right away.
While the polenta is cooling, you can make the ragout. For the ragout you will need:
1/4 red bell pepper, chopped
1 zucchini, halved lengthwise and sliced
6 mushrooms, halved then sliced
3 garlic cloves, minced
1 lb italian sausage
2 cups prepared spaghetti sauce
salt and pepper, to taste
1 tablespoon italian seasoning
1 teaspoon red pepper flakes
In a large skillet, brown the sausage. Season with salt, pepper, red pepper flakes, and italian seasoning.
Add the onions, wait one minute, then add the red pepper. Wait another minute, then add the zucchini, mushrooms, and garlic. Once the vegetables are tender, add the spaghetti sauce. Reduce heat to low, and set aside so the flavors mingle.
The polenta should be cold and firm now, so pull it and slice it into 9 or 16 slices, depending on your preference.
Heat a small skillet until hot hot hot. Add a drop of olive oil (or butter), then add your polenta squares. Saute them until both sides are golden brown and crispy.
Remove them onto a plate with paper towel (to absorb the oil, of course.)
Serve the polenta squares on a plate with the sausage ragout spooned over them. Garnish them with fresh grated parmesan cheese.
I promise you, you cannot go wrong with this dinner. Paul has had 3 1/2 servings today, he just can't get enough.
Now, we're off to try to make our own ice cream--I'll let you know how that goes!
October 14, 2010
Chicken Tetrazzini
Last weekend I was able to FINALLY visit my best-best-best friend Claire and her family in Texas. Paul had a "business" trip to Texas, so I thought it would be a perfect opportunity to get out of here and go visit my bestie.
Claire's husband, Stephen is in the Army and althought they are from Michigan (like me!) they are stationed at Fort Hood in Texas. I had so much fun visiting Claire, Stephen, and their precious 16 month old, Rylee--and also got to learn all about Army, Army life, and Army lingo. Unfortunately, the only pictures I managed to snag of Claire were of her picking wedgies--so I'll save her the embarrassment of posting those.
While visiting, Claire treated me to one of my absolute most favorite dinners from our childhood, Chicken Tetrazzini. Claire's mom always made THE BEST chicken tetrazzini, but she only made it when someone died or for birthdays, so it was always a rare, special treat. Until last weekend, it had been more than five years since I had had this delectable dinner--but it's amazingness was not forgotten by me.
So, without further adeau, I present to you:
Chicken Tetrazzini recipe adapted from Marilee Ludwick
What you'll need:
1 lb spaghetti noodles
2 cans cream of chicken soup
16 ounces sour cream
2-3 chicken breasts, boiled and shredded
2 cups shredded parmesan cheese
salt and pepper, to taste
1 tablespoon garlic powder
Boil your pasta and your chicken
Meanwhile:
Mix the chicken soup and sour cream in a bowl. We also added a small can of mushrooms--your choice. You could even add peas, beans, asparagus, or any other vegetables you like.
What a mooch!
Banana's. Yummy!
Oh. Sorry. Distractions.
Back to the food!
Strain your s'ghetti
(WHAT? A man in the kitchen?)
Shred your chicken.
Add it all to the bowl, along with your seasonings, and stir until combined.
Dump it into a 9x13 baking dish, and top with the shredded parmesan.
Then, just pop it in the oven at 350˚ uncovered for about 30 minutes, or until bubbly and brown...
Like this!
YUM.
You WILL NOT be disappointed with this dinner.
I PROMISE.
So good.
SO so good.
Yum.
Subscribe to:
Posts (Atom)